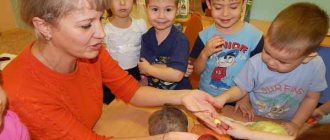
Modeling from plasticine - games for children
- Imprints - roll out your modeling mass and imprint on it the baby’s palm, fingers, various toys, small objects, plant leaves, twigs, shells, pebbles, etc. Compare the imprints, describe them in words.
- Roll and cut - children have fun cutting plasticine using the stacks that are included in almost every set. Play kitchen: roll balls and sausages, let it be bread or vegetables. Let your child cut them up and make soup or sandwiches, or feed them to their favorite toy.
- Find the item - hide a coin, button or small toy inside a piece of modeling material and invite your child to find it. Kids love this game and are ready to play it endlessly.
- Application with plasticine - prepare pictures on which you will glue the plasticine. These could be contours that need to be covered with plasticine of the desired color, or it could be a finished picture that only lacks a few details. Let the child pinch off small pieces of plasticine themselves, glue them or smear them on paper.
- The “stuck” method is something between sculpting and appliqué. In this case, the mother sculpts, for example, a giraffe, and the child puts spots on it. You can also decorate your phone with buttons, a ladybug with dots, a Christmas tree with toys, etc.
Glade
Polyana is a multi-composition application in kindergarten for children 5-6 years old. Here we will get acquainted with models that need to be made first, and only then fixed to the base. Volumetric types of applications are made with such an original sample.
Our base is blue cardboard. This is heaven. The sun is shining. The grass grows and flowers bloom in it. And butterflies and dragonflies flutter above them. All parts are made of accordion-folded paper.
- Grass
. We fold a strip 5 cm wide and 2 times longer than the bottom of the base like an accordion. Cut off the top (approx. 1 cm) at an acute angle. Glue the strip. - Flower.
We fold a long strip 3-5 cm wide and turn it in a circle so as to connect the edges. We secure them. The flower is ready. We make several of these products in different colors.
Don't forget about the stems (glued strips) and leaves (accordions in half).
- Butterfly
. Cut off and round the edges of a sheet of paper. Fold crosswise like an accordion. We do the same with a sheet of smaller size and a different color.
We connect 2 sheets in the middle with a strip. We secure them. Spread the wings.
- Sun.
Cover the top corner with a yellow triangle. We attach a corrugated strip along its edge, creating rays. - Dragonfly
. Cut out 2 blanks from a plain sheet. One is in the form of a figure eight, the second is a droplet. Glue a droplet to the base and next to it a figure eight so that between its circles we place corrugated wings fastened in the middle. - The clearing came to life and bloomed to the delight of the children.
Flower meadow
This clearing is an application for the younger group for children 4 years old. It can be any size and color. And several kids can work on it together at the same time
It is only important for each of them to indicate his area of work
Lesson in 3 stages:
- We are preparing a green meadow. To do this, you either just take a green leaf, or decorate it with paints or felt-tip pens.
- Fold a piece of paper 4 times. We do not touch the corner of the fold, we round off the other three, cutting them off with scissors. This is the basis for flowers. But they can be made in another way, if you glue 3 or more circles side by side, in a circle.
- Cut out small multi-colored circles. In the middle of one or the other workpiece we place a circle - the core.
- For children 3-4 years old, such an application will not be difficult to make. You just need to cut more of these flowers to fill the entire clearing with them.


