It’s no secret that children love everything bright and beautiful; a rich, rich palette attracts the child’s attention. Therefore, a rainbow made of colored paper is one of the most common and favorite crafts for children. We offer you materials and instructions for creating this fun composition: videos, templates, different assembly methods and types of finished work. A simple creative process for children will be very interesting and exciting, and simple elements of the craft in the finished version will look neat and impressive.
- How to make a paper rainbow with your children
- Required materials and tools
- Step-by-step creation of applications from photos
- Step-by-step assembly of a three-dimensional craft
- Origami with a simple diagram
- Templates and stencils for cutting
- Examples of ready-made crafts
How to make a paper rainbow with your children
To clearly explain to your child how to make a rainbow from colored paper with your own hands, you can remind them before starting work that a rainbow is an atmospheric phenomenon. It can only be seen when it is raining and the sun is shining at the same time.
The second important point is that the 7 colors of the rainbow are always the same and unchanging (as they say in the children's joke about a pheasant...), and their sequence should be observed when assembling the composition. The next nuance is that the obligatory geometric shape of the craft must be maintained - an even arc (semicircle).
Depending on what material is used, the finished craft will have some features. For example, a rainbow made of corrugated paper will differ from its counterpart made of classic colored paper. The last work has clear and contrasting transitions, while the first will be more voluminous, delicate, with slightly blurred boundaries (due to the compressed texture of the paper).
Having familiarized the child with the important points during assembly and its sequence, you can begin to work.
Required materials and tools
To create a paper rainbow you will need:
- colored paper, cardboard, white paper;
- scissors;
- pencil and eraser;
- glue, tape, stapler;
- felt-tip pens or paints for drawing small, additional elements.
When making an applique, you may need frames, stands or ribbons (for hanging).
Step-by-step creation of applications from photos
A rainbow applique made from colored paper can be easily done even by the smallest “masters” of the junior group of kindergarten. Simple craft steps:
- Using the template, narrow stripes (1.5-2 cm wide) are drawn and cut out in 7 rainbow colors (red, orange, yellow, green, blue, indigo and violet), then a yellow or orange sun, and white or blue clouds (2 PC.).
- The strips are glued to a sheet of white paper in the appropriate order, tightly to each other, and the glue is allowed to dry.
- The excess white paper is cut off from the resulting rainbow and the sides are aligned.
- The sun is fixed on the base of the future application (cardboard, sheet of paper) in the upper part on the right or left, and possibly in the middle.
- In the middle part, a rainbow blank is placed horizontally, and carefully lifted, creating an even arc, glued or secured with a stapler or tape.
- The last ones to glue are the clouds at the edges of the rainbow.
You can add birds to the composition, add a smile to the sun, and drops of rain to the clouds.
The paper appliqué can be simplified even more if the rainbow is not given a curved three-dimensional shape, but simply glued to the base, with “rays” from the sun diagonally to the cloud, which can be created from cotton wool.
To prevent cotton air clouds from losing their appearance over time and becoming disheveled, you can carefully spray them with hairspray from a long distance (30-40 cm). If you use varnish with glitter, you will get the effect of “reflections of droplets in the sun.”
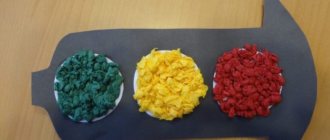
An interesting version of the applique, in which the stripes of the future rainbow are cut into squares. Then each spectrum is assembled into an arc of these squares (like a mosaic).
Step-by-step assembly of a three-dimensional craft
A rainbow for cutting can be slightly complicated; consider an option that is suitable for decorating interiors or themed celebrations (hanging, or stationary on a table or shelf). The assembly proceeds in stages:
- Strip blanks are made from colored paper in the required 7 shades - 2 cm wide, 12-14 cm long;
- the strips are first placed on the table in the color sequence in which they should be in their natural environment;
- the first upper red stripe remains with the original length, and all the rest are shortened, relative to the previous one by 1-1.5 cm;
- using a scissor blade, each strip is given a curved shape;
- The rainbow is assembled - an orange stripe is glued to the red stripe (from below), glue is applied to both edges of the stripes;
- there should be free space between the strips (1-5 cm), and the shape of the arc should be maintained;
- then all the strips are glued in the same pattern, the last one is more straight - purple;
- Air clouds (of arbitrary shape) are formed from cotton wool or polystyrene foam, and a prepared rainbow is glued to them.
The voluminous paper rainbow is ready, it can be placed in the most prominent place, and it will lift your spirits with its bright and cheerful appearance. For hanging use, thread a string through the bottom side (in the center of all strips) and tie it with a bow.
It is advisable to make small slits in the foam, where the ends of the rainbow will fit perfectly, and then fix them with glue.
A voluminous craft with a more complex technique can be made using the classic version of the applique, but the strips will not be pre-glued to the base:
- The first to be fixed with glue (on the sides) in the form of an arc is the central green strip;
- then the following strips are attached closely to it on each side;
- nuance - the orange stripe should slightly overlap the yellow one, and the red stripe should overlap the orange one;
- the same thing on the other side - the blue one goes over the blue stripe, and the purple one goes over the blue one.
This creates a more even and rounded outline of the rainbow. A sun and a cloud are glued to the edges of the rainbow - these are the symbols that make the rainbow appear.
Video master class
The master class, which is worth familiarizing yourself with before starting work, helps your child understand in more detail the principle of assembling a craft, and appreciate the final spectacular result of a beautiful rainbow made of colored paper.
Origami with a simple diagram
An origami rainbow with a simple diagram can be assembled very quickly, even by a child:
- prepare squares of colored paper (in the spectrum of rainbow colors) with dimensions of 5x5 cm;
- make modules from which the craft will be assembled;
- the paper square is folded diagonally, then vertically in the middle;
- the workpiece is turned over with the fold up;
- the lower right part is bent upward at a right angle, also repeated on the left side;
- the workpiece is turned over with the bottom up;
- the upper right corner is bent down, then the left as well;
- the resulting triangle is turned over with the wide side up, and by carefully bending the pocket, they create the shape of a flag with two sharp corners;
- The finished module has one folding side and one blind side;
- start assembling the craft - insert the orange module through the opening side into the red module so that the latter protrudes by 4-5 mm;
- the sharp corners of the red flag on the folding side (top and bottom) are folded into the pocket of the orange module (securely fastened);
- Using this principle, they continue to assemble the rainbow craft; you can alternate the 7-color spectrum several times.
The original rainbow snake is ready. If desired, its ends can be connected with glue, you will get a round wriggling rainbow. Now the child knows how to make a rainbow out of paper that will attract the attention of others and lift their spirits.
Paper Stars Applique in Rainbow Colors Stock Vector
Other stock illustrations
Cat cloud rainbow colorful seamless pattern
Seamless stars night sky blue yellow holiday Christmas children pattern illustration applique background texture elements
Background of colorful star appliqués
000 White silhouettes of snowy fir trees against the blue winter sky. Banner with a simple applique. Hill with trees, stars in
Paper game for preschoolers. Cut out and glue the kitten animal. Puzzle - application. Handmade to create a pet
Abstract origami white paper star background.
Moon and stars on a blue background, top view. Night sky objects with shadow close up. Decorative background. Children's applique,
Abstract paper origami concept
Paper applique mosque
Application - sailboat night ocean
White banner with stars, clouds and owl
Seamless pattern with trendy patches with toucan, flamingo, parrot, exotic leaves, hearts, stars, speech bubbles, pineapple.
Vintage stamp with university stars
stars and clouds hang
.
Templates and stencils for cutting
Rainbow templates for cutting greatly simplify and reduce the time spent working on crafts - you just need to print them out and start assembling. The child does not need to independently draw and then cut out individual details to assemble the composition, which may not turn out particularly successful. When using ready-made stencils, all children will have the same blanks - no one will be upset or upset (due to unsuccessfully drawn details).
Summary of the lesson on the application “The Sun Visiting the Children” in the second junior group
Summary of the lesson on the application “The Sun Visiting the Children” in the second junior group
Job title:
“The sun is visiting the guys.”
Goals:
• Continue to learn how to draw long, straight lines in different directions.
• Strengthen the ability to recognize and name the shape of an object, knowledge of primary colors: green, red, blue, yellow. • Enrich passive vocabulary, name the state of the weather: it is shining, the sun is warming. • Develop the articulatory apparatus and fine motor skills of the hands. • Cultivate children's interest in visual arts activities. Vocabulary work:
Radiant, multi-colored.
Materials:
Bows, a chest, “screens” with semolina, an umbrella, a musical game “Sun and Rain,” a colored runner, hoops, illustrations of the sun, clouds.
Preliminary work
: Observations of the sun; conversations about seasonal changes in nature; reading poetry, riddles about the sun; looking at illustrations.
Progress of classes.
Educator:
All the children gathered in a circle. You are my friend and you are my friend.
Let's hold hands tightly and smile at each other. -Guys, we have guests today, let’s say hello to them
(Hello).
- Guys, I want to tell you a riddle, listen carefully.
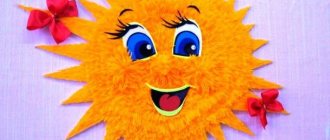
It warms the whole world. And he doesn’t know fatigue. Smiles in the window And everyone calls him ...... (sun). Educator:
Correct “Sun” (show a picture of the sun).
Educator:
“Oh,” guys, it came to visit us today.
Look, it's so beautiful. The sun wakes up before everyone else, washes itself from the clouds and rises high into the sky to do “Good deeds.” And what “good deeds” does the sun do? Children:
- It shines.
Educator:
what else?
Children:
- It warms.
Educator
: Yes, guys, the sun illuminates the earth and warms us all with its rays.
Tell me, what is our sun? Children:
Yellow, bright, cheerful
Educator:
Look, the sun has long straight rays, that’s why it’s radiant.
Tell me, what kind of sunshine is it? Children:
radiant (2-3 children repeat the new word)
Educator:
What figure is hidden in our sun?
Children:
circle.
Educator:
Correct.
Guys, can we decorate our sun? Children:
Yes.
Educator:
How can you decorate the sun?
Children:
hat, beads, flowers, make up lips, eyes, tie bows.
Educator::
Yes, guys, we’ll decorate our sun with bows. But the bows are in a magic chest, and we need to get to it along our path. If we follow it, we will find the chest.
Here is the path ahead (a path made of fabric) How can we get through it? (hoops) We put our hands on the side, push with our feet, Jump-jump, jump-jump (repeat 3 times) So we see the chest.
Educator:
What a beautiful chest, and there are beautiful bows in it.
-How many bows do I have? Children:
A lot.
Educator:
Now I’ll give you bows, and you look at them.
- Anya, how many bows do you have? (one).
What color is he?
(Red)
-Masha, what color is your bow?
(green)
.
How many of them do you have? (one)
-Vika, how many bows do you have, and what color is it?
(One, blue).
Educator:
Did a great job!
Now let's go to the table and tie our bows to the sun. Guys, we have “One” sun, and “Many” rays we attach a bow to each ray (practical work). Educator:
Guys, look, all our bows are different colors, which means they are multi-colored.
- Nadya, what kind of bows? (multi-colored)
- Dasha, what bows?
(multi-colored) When the sun is shining, you can play.
Jump, stomp, have fun playing in the kindergarten. Come on, kids, stand up, let's play with the sun. Musical game “Sunshine and Rain”.
Educator
: Guys, look, “Tuchka-Plakuchka” has covered our sun.
And let’s, together with you, draw the sun, and maybe then the sun will peek out from behind the clouds, everyone will be brighter and warmer from it. Do you agree? Children:
Yes!
Educator:
Go to the tables
(seat).
-We will draw not with brushes or pencils, but with our fingers, we need to warm them up first.
Finger gymnastics. Sunshine, sunshine (they beckon with their fingers) Look out the window (they connect the thumb and index finger, making a window) Come to us, sunshine (they beckon with their hands) Shine a little light. (They shake their raised arms above their heads)
Practical part.
Educator:
Guys, we will draw with our fingers on magic screens.
Tell me again, what is the sun made of? Children:
From a circle and rays.
Educator:
Correct.
We prepared our finger - a pointer and in the air we first draw a circle, and now the rays are long, straight. Now draw the sun yourself. What beautiful suns you got (we get up from the table)
.
Well done guys, Cloud - Little Cloud has flown away, we have freed our sun. The sun will shine and keep the kids warm, but here are some treats for you from the sun... (give to children)
Let's say goodbye to the sun. Goodbye!
Examples of ready-made crafts
The rainbow craft looks great in any type of execution - in three-dimensional form, or origami, or panels. In addition, you can always make your own author’s changes and additions to the work, which will give the craft a feature and originality.
Paper rainbow is a great leisure activity. Exciting, interesting work will not only lift the child’s spirits, but will also add new knowledge about the world around him. The finished craft can be used in games, or for interior decoration, or you can give it to a loved one as a souvenir.
Paper Stars Applique in Rainbow Colors Stock Vector
Other stock illustrations
Cat cloud rainbow colorful seamless pattern
Seamless stars night sky blue yellow holiday Christmas children pattern illustration applique background texture elements
Background of colorful star appliqués
000 White silhouettes of snowy fir trees against the blue winter sky. Banner with a simple applique. Hill with trees, stars in
Paper game for preschoolers. Cut out and glue the kitten animal. Puzzle - application. Handmade to create a pet
Abstract origami white paper star background.
Moon and stars on a blue background, top view. Night sky objects with shadow close up. Decorative background. Children's applique,
Abstract paper origami concept
Paper applique mosque
Application - sailboat night ocean
White banner with stars, clouds and owl
Seamless pattern with trendy patches with toucan, flamingo, parrot, exotic leaves, hearts, stars, speech bubbles, pineapple.
Vintage stamp with university stars
stars and clouds hang
.
Rainbow from curtains
Curtains are an excellent addition to the decor. And rainbow blinders are truly fantastic, they look very original and unusual. If you want to make curtains yourself, then run to the store and buy multi-colored material.
Draping curtains and hanging them will not be difficult. If you doubt that the work will not work out or you don’t have enough ideas on how to design everything attractively, then we recommend contacting a professional designer. He will tell you exactly how to arrange your room.
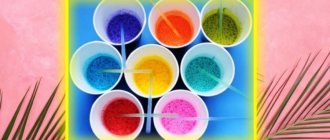
Rainbow of fruits
It will be easier to assemble such a dish in summer than in winter, since a large number of fruits during this season will add special colors. However, you can make a rainbow of fruits in winter if you know where you can buy brightly colored fruits.
To create a rainbow take:
- 300 g raspberries,
- Strawberries,
- Mango,
- Pineapple,
- Kiwi,
- Blueberries,
- Blueberries,
- Mulberries.
Quite large fruits should be cut into cubes. A white plate is ideal, but if you don’t have one, then take light-colored dishes (preferably plain). You can arrange the cutting in any way you like; a very beautiful option would be to arrange it starting from the middle, twisting the rainbow into a spiral.
You can experiment as you like. Whipped cream in the middle of the fruit will add a zest to this dish.