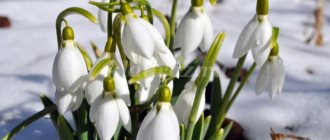
Mimosa is clearly associated with the spring holiday, International Women's Day. Nowadays, giving a sprig of mimosa on March 8 is no longer so relevant. But once upon a time this plant was brought to all major cities in unimaginable quantities. In general, mimosa is one of the varieties of acacia. In total there are about 1200 species. They mainly grow in Africa, South America and Australia. African varieties have thorns. This is where their name Akis (Greek) comes from - meaning “edge”. By the way, in France at the end of February every year there is a festival in honor of mimosa. It was introduced in the 19th century and has since been found throughout the south of this country. Many people believe that silver acacia is a shrub. It is not always so.
Sometimes the acacia reaches 25 meters in height. Its bark is smooth and dark gray in color. The tree is spreading and evergreen. Covered with bright yellow fluffy balls, and under them there are small silver-green leaves. One of the accessible ways to admire a fluffy tree is to depict it on paper. We will talk about how to draw a mimosa. Let's look at several ways that will allow every person (both the baby and his parents) to feel like a real artist.
How to draw a mimosa step by step?
Drawing a mimosa on a piece of paper is not difficult at all. But the process requires some patience. How to draw a mimosa with a pencil step by step? To begin, prepare a sheet of paper, colored pencils, an eraser, hard and soft pencils. Designate a place for flowers and leaves. Using a simple hard pencil you need to draw the contours of the stain. It can be of any shape. It all depends on your imagination. Next, the place where the balls will be located needs to be circled with a circle of any shape. In the place where the leaves will be, you should draw straight lines in different directions. Thinner lines should emanate from them. In the areas intended for flowers, you need to draw a lot of circles and use zigzag strokes to give them volume. Drawing leaves is even easier. On the small lines coming from the branch, draw short strokes. Things will go faster if you draw strokes without lifting your hands, in a zigzag manner. This way you need to display all the leaves.
Flowers and leaves
Think about where the flowers will be in your drawing and where the leaves will be. Draw an irregular circle around the place where the fluffy balls will be. There may be several such areas, because the mimosa is all strewn with flowers. Where the leaves will be, draw straight lines in different directions. They can be double in some places, because mimosa branches have different thicknesses. At an angle to these lines, draw thinner straight lines.
If you draw a mimosa with colored pencils, immediately outline the areas for flowers with a yellow pencil. Draw straight lines for the branches in brown.
March 8
How to draw a mimosa on a postcard? Everything is very simple here. A sprig of mimosa can be made in the shape of the number “8”. To do this, you need to draw a three-dimensional figure eight on the top side of the postcard with a simple pencil. Further from the number you need to draw branches on both sides. They will look better if you make them asymmetrical. On the drawn figure eight, you need to depict mimosa balls using yellow gouache. Next, take light brown paint and fill the space between the balls with it. Then color the branches green. The postcard is ready. All that remains is to write a congratulatory verse.
Mimosa balls
Take a close look at what mimosa flowers look like. Each of them is a small fluffy ball. You can draw many, many circles in the areas intended for flowers using the most ordinary thin lines. But it’s much better to make the flowers fluffy right away. For all this, you need to draw not with thin lines, but with zigzag lines. Drawing a circle by applying strokes across the circle and without lifting your hand is not so difficult - just try it on a separate sheet. Draw a lot of these spiky balls.
Gouache
If we talk about how to paint a mimosa with paints, then everything is simple here too. Prepare jars of gouache, cotton swabs, brushes of different sizes, a sheet of paper and a cloth to wipe your tools and hands. Take a wide brush and wet the sheet with water. Next, with the same brush you need to make several strokes with green and blue colors of different shades. There should be a lot of paint. Then paint over the entire sheet with the paint already applied. No need to wait for it to dry. Take a skewer or brush and, with the back of the cutting, mark mimosa branches from which small stems will emanate at an angle of 45°. If you don’t like something, you can simply paint over everything and start over. Next, you can take a little dark yellow or light brown paint on your little finger and apply circles to the branches. Then, using a cotton swab with orange paint on it, you must also apply circles. Change the stick and apply yellow balls in the same way. If desired, you can add just a few white dots. The drawing is ready. You can draw such a mimosa either independently or with your child. He'll really like it.
Mimosa in watercolor
Mimosa flowers are very small and resemble fluffy flowers. They are collected in chic tassels, and the branches look bright and delicate. It is customary to give such bouquets in the spring for International Women's Day; you can also make all kinds of applications, crafts or create drawings. This tutorial shows you how to paint a Mimosa design in watercolor. We must try to convey the color of this unusual plant. It has oblong leaves reminiscent of pine needles, dense bunches of inflorescences consisting of bright yellow lumps. Mature mimosa flowers are darker, and those that have barely bloomed are greenish. It is necessary to use watercolor paints from green to brown to show bouquets of different saturations. Now about how to draw flowers.
For the drawing lesson you will need:
- sheet;
- paints;
- brush (necessarily thin at the end);
- black fine liner;
- water;
- simple pencil.
How to draw a mimosa step by step
A pencil is necessary to outline all the details of the drawing. Show the twig, leaves (move aside the fringe-like strokes), outline the circles - inflorescences located close to each other.
Using the thin tip of the brush, begin to draw the leaves. Use light green paint. Draw a Christmas tree and also draw a stem.
Now soak the brush in light yellow paint and highlight all the round mimosa inflorescences.
Apply a darker green shade to the tip of the brush and go over the leaves again, do the same in the flower area, but use a darker yellow paint.
In some places, add brown spots and dots on the inflorescences.
Once the drawing is set, you need to work out the existing details. Go over the leaves a third time, a third time with a darker shade and continue highlighting the flowers, outlining the circles.
Make the drawing more vibrant. Go over all the lines again, don’t forget to fill the gaps between the leaves and inflorescences with twigs and green hairs.
When the drawing dries, highlight the darkest areas again.
A beautiful mimosa branch has already been drawn in watercolor, but you can additionally highlight the lines with a black liner. Draw the bunches of fluffy creatures with wavy chaotic lines and add dots in the darkest places. Go over the leaves, duplicating the strokes made with watercolors, and show the stem, which you have drawn in dark green. The “Mimosa” watercolor drawing is ready.
Learn how to draw a mimosa in different ways
Mimosa is clearly associated with the spring holiday, International Women's Day. Nowadays, giving a sprig of mimosa on March 8 is no longer so relevant. But once upon a time this plant was brought to all major cities in unimaginable quantities. In general, mimosa is one of the varieties of acacia. In total there are about 1200 species. They mainly grow in Africa, South America and Australia. African varieties have thorns. This is where their name Akis (Greek) comes from - meaning “edge”. By the way, in France at the end of February every year there is a festival in honor of mimosa. It was introduced in the 19th century and has since been found throughout the south of this country. Many people believe that silver acacia is a shrub. It is not always so.
Sometimes the acacia reaches 25 meters in height. Its bark is smooth and dark gray in color. The tree is spreading and evergreen. Covered with bright yellow fluffy balls, and under them there are small silver-green leaves. One of the accessible ways to admire a fluffy tree is to depict it on paper. We will talk about how to draw a mimosa. Let's look at several ways that will allow every person (both the baby and his parents) to feel like a real artist.
How to draw a mimosa step by step?
Drawing a mimosa on a piece of paper is not difficult at all. But the process requires some patience. How to draw a mimosa with a pencil step by step? To begin, prepare a sheet of paper, colored pencils, an eraser, hard and soft pencils. Designate a place for flowers and leaves. Using a simple hard pencil you need to draw the contours of the stain. It can be of any shape. It all depends on your imagination. Next, the place where the balls will be located needs to be circled with a circle of any shape. In the place where the leaves will be, you should draw straight lines in different directions. Thinner lines should emanate from them. In the areas intended for flowers, you need to draw a lot of circles and use zigzag strokes to give them volume. Drawing leaves is even easier. On the small lines coming from the branch, draw short strokes. Things will go faster if you draw strokes without lifting your hands, in a zigzag manner. This way you need to display all the leaves.
March 8
How to draw a mimosa on a postcard? Everything is very simple here. A sprig of mimosa can be made in the shape of the number “8”. To do this, you need to draw a three-dimensional figure eight on the top side of the postcard with a simple pencil. Further from the number you need to draw branches on both sides. They will look better if you make them asymmetrical. On the drawn figure eight, you need to depict mimosa balls using yellow gouache. Next, take light brown paint and fill the space between the balls with it. Then color the branches green. The postcard is ready. All that remains is to write a congratulatory verse.
Gouache
If we talk about how to paint a mimosa with paints, then everything is simple here too. Prepare jars of gouache, cotton swabs, brushes of different sizes, a sheet of paper and a cloth to wipe your tools and hands. Take a wide brush and wet the sheet with water. Next, with the same brush you need to make several strokes with green and blue colors of different shades. There should be a lot of paint. Then paint over the entire sheet with the paint already applied. No need to wait for it to dry. Take a skewer or brush and, with the back of the cutting, mark mimosa branches from which small stems will emanate at an angle of 45°. If you don’t like something, you can simply paint over everything and start over. Next, you can take a little dark yellow or light brown paint on your little finger and apply circles to the branches. Then, using a cotton swab with orange paint on it, you must also apply circles. Change the stick and apply yellow balls in the same way. If desired, you can add just a few white dots. The drawing is ready. You can draw such a mimosa either independently or with your child. He'll really like it.
Napkins
Another way to draw a mimosa. First you need to mark a branch with branches with a pencil. There should be fern-like leaves at the bottom. The branch can be outlined with a brown pencil, and the leaves with green.
In order to make fluffy balls, you need to take yellow napkins, roll them into balls and glue them onto mimosa branches using PVA. This is probably the easiest way to draw a mimosa.
The role of co-creation
Mimosa is the easiest flower to draw. Even the smallest child who knows how to handle pencils and paints can handle it. And creativity together with parents, as a rule, brings people closer together. The child begins to trust his parents more and share his experiences. Do you want to establish emotional contact with your child? Feel free to take up paints and pencils. And you already know how to draw a mimosa.
autogear.ru
How to paint a mimosa with watercolors: a step-by-step master class with photos
We will devote this lesson to drawing fluffy and yellow branches of fragrant mimosa.
But to make the drawing interesting and complicate it a little, let’s create a small composition with the main object. To do this, we’ll draw a white porcelain vase, and place fluffy branches with inflorescences in the vase. Let's dilute the yellow bouquet with green leaves. The “raw” technique is perfect for painting mimosa. The paint spreading over the wet surface of the paper will create a wonderful fluffy effect of the inflorescences. The technique will also help in creating shadow and color reflexes. Step-by-step instructions with photos will help you paint a mimosa with watercolors with your own hands. Materials and tools for drawing mimosa:
- high-density watercolor paper;
- several synthetic fiber brushes No. 8 and 3;
- a simple hard pencil with an eraser;
- palette;
- a set of watercolor paints;
- tablet and adhesive tape;
- water.
Learn how to draw a mimosa in different ways
Mimosa is clearly associated with the spring holiday, International Women's Day. Nowadays, giving a sprig of mimosa on March 8 is no longer so relevant. But once upon a time this plant was brought to all major cities in unimaginable quantities. In general, mimosa is one of the varieties of acacia. In total there are about 1200 species. They mainly grow in Africa, South America and Australia. African varieties have thorns. This is where their name Akis (Greek) comes from - meaning “edge”. By the way, in France at the end of February every year there is a festival in honor of mimosa. It was introduced in the 19th century and has since been found throughout the south of this country. Many people believe that silver acacia is a shrub. It is not always so.
Sometimes the acacia reaches 25 meters in height. Its bark is smooth and dark gray in color. The tree is spreading and evergreen. Covered with bright yellow fluffy balls, and under them there are small silver-green leaves. One of the accessible ways to admire a fluffy tree is to depict it on paper. We will talk about how to draw a mimosa. Let's look at several ways that will allow every person (both the baby and his parents) to feel like a real artist.
How to draw a mimosa step by step?
Drawing a mimosa on a piece of paper is not difficult at all. But the process requires some patience. How to draw a mimosa with a pencil step by step? To begin, prepare a sheet of paper, colored pencils, an eraser, hard and soft pencils. Designate a place for flowers and leaves. Using a simple hard pencil you need to draw the contours of the stain. It can be of any shape. It all depends on your imagination. Next, the place where the balls will be located needs to be circled with a circle of any shape. In the place where the leaves will be, you should draw straight lines in different directions. Thinner lines should emanate from them. In the areas intended for flowers, you need to draw a lot of circles and use zigzag strokes to give them volume. Drawing leaves is even easier. On the small lines coming from the branch, draw short strokes. Things will go faster if you draw strokes without lifting your hands, in a zigzag manner. This way you need to display all the leaves.
March 8
How to draw a mimosa on a postcard? Everything is very simple here. A sprig of mimosa can be made in the shape of the number “8”. To do this, you need to draw a three-dimensional figure eight on the top side of the postcard with a simple pencil. Further from the number you need to draw branches on both sides. They will look better if you make them asymmetrical. On the drawn figure eight, you need to depict mimosa balls using yellow gouache. Next, take light brown paint and fill the space between the balls with it. Then color the branches green. The postcard is ready. All that remains is to write a congratulatory verse.
Gouache
If we talk about how to paint a mimosa with paints, then everything is simple here too. Prepare jars of gouache, cotton swabs, brushes of different sizes, a sheet of paper and a cloth to wipe your tools and hands. Take a wide brush and wet the sheet with water. Next, with the same brush you need to make several strokes with green and blue colors of different shades. There should be a lot of paint. Then paint over the entire sheet with the paint already applied. No need to wait for it to dry. Take a skewer or brush and, with the back of the cutting, mark mimosa branches from which small stems will emanate at an angle of 45°. If you don’t like something, you can simply paint over everything and start over. Next, you can take a little dark yellow or light brown paint on your little finger and apply circles to the branches. Then, using a cotton swab with orange paint on it, you must also apply circles. Change the stick and apply yellow balls in the same way. If desired, you can add just a few white dots. The drawing is ready. You can draw such a mimosa either independently or with your child. He'll really like it.
Napkins
Another way to draw a mimosa. First you need to mark a branch with branches with a pencil. There should be fern-like leaves at the bottom. The branch can be outlined with a brown pencil, and the leaves with green.
In order to make fluffy balls, you need to take yellow napkins, roll them into balls and glue them onto mimosa branches using PVA. This is probably the easiest way to draw a mimosa.
The role of co-creation
Mimosa is the easiest flower to draw. Even the smallest child who knows how to handle pencils and paints can handle it. And creativity together with parents, as a rule, brings people closer together. The child begins to trust his parents more and share his experiences. Do you want to establish emotional contact with your child? Feel free to take up paints and pencils. And you already know how to draw a mimosa.
fb.ru
How to draw a mimosa. ▷ Step by step we draw a mimosa branch with pencillash
Content
Mimosa is a yellow, fluffy, fragrant flower that is associated with March 8th . It is on this holiday that everyone exchanges sprigs of mimosa, and all the flower shops are full of yellow. Of course, not only on the eve of Women's Day, but also on any day, an aspiring artist wants to add a sprig of mimosa to his painting. If you want to try to draw this wonderful flower, I suggest you read this article, where I prepared a drawing of a mimosa and will tell you how to draw a mimosa step by step. It's not difficult at all, you just need perseverance.
For this you will need:
- a simple pencil;
- paper;
- eraser;
- colour pencils.
- Take a simple pencil and place the twig in the plane of the sheet.
- We already have one main branch, so we draw the branches coming from it, on which yellow flowers and mimosa leaves will be placed.
- We are gradually adding more branches to make our bouquet more magnificent.
- In order to draw a mimosa with a pencil, you will have to tinker, because when painting this flower with paints, you could just dip your finger in the yellow paint and quickly add yellow dots. And here you need to draw each circle, which we will do.
- We draw the veins of the leaves to make it easier for us to draw them.
- Now let’s draw our slightly fluffy leaves in full.
- To decorate the mimosa, I took a dark yellow colored pencil (you can use orange) and I outlined each ball with this particular color, and not just outlined it, but made them fluffy, and also drew a center.
- After that, I took a bright yellow pencil and colored all the balls completely. When coloring the leaves, I used two shades of green.
Let's look at how you can paint a mimosa with paints step by step. This option is suitable even for the smallest children and adults. There is no easier way to draw!
- Take gouache or watercolor and a thin brush. Draw a “naked” mimosa branch.
- Now we put the brush aside and start painting with, believe it or not, our finger! Yes Yes. We just noticed the most convenient finger (for me it’s the index finger) and dip it in the paint, after which we simply poke it on the branches and yellow flowers gradually appear! Isn't it easy?
- To fully complete the mimosa branch, you will have to go back to the brush and finish drawing the leaves.
Rate the article
risovat-prosto.ru