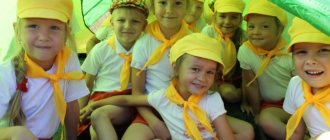
Summary of the design lesson “How we build houses for pets”
Main part. Introduction to the topic of the lesson.
The teacher suggests paying attention to the screen.
A presentation of “architecture” is shown on the screen. The teacher, together with the children, comment on photographs of buildings projected on the screen, noting the materials, beauty and unusualness of the structures.
A slide with a picture of a kindergarten appears on the screen. Children recognize the building. Together with the teacher, they describe the external and internal structure of the building.
Educator:
What is a kindergarten? (this is a house for the guys) Why was it built? (for children to play, study, eat, sleep, draw, dance here) What is the difference between a kindergarten and a house where pets live? (comfortable, beautiful, cozy)
Slides with images of animal dwellings appear on the screen, the teacher clarifies the names of the buildings and the names of the animals living in these buildings, and together with the children note the strength and safety of the structures.
Goal setting and activity planning.
A video of the appeal of Lego men is shown on the screen. “We traveled around the Perm region and saw animals grazing in meadows and fields, they probably have no shelter, who can help them?”
Educator:
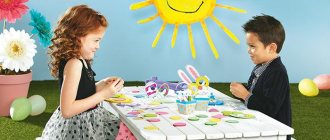
Do you want to help them? (yes) Now I suggest you play architects. To play, you need to divide into teams using stickers and occupy your tables with construction sets based on color and receive a task to build houses for animals together. The hardest part will be designing the animal. Can you handle it? (yes) Then choose stickers and go to your tables.
Children are divided into teams of 4 people and take seats at the tables.
Educator:
Before we start, please tell me what we will do?
Children describe the sequence of actions, open envelopes with diagrams of animals, an illustration of a building, and construct homes for pets.
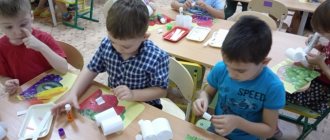
Work in groups.
During the activity, the teacher checks whether the building has windows and whether the animal will pass through the doors. The teacher plays the role of a tutor, advises children, and helps solve difficulties.
Children say they are ready and play with the building with animals.
When the children finish constructing the buildings, the teacher invites the children to come to the table of one of the teams.
Project protection
The teacher invites the children to tell what they did, why they built the building and what it is called. He asks if they succeeded in what they had in mind. Children evaluate their work and conclude that everyone completed the task. Children also take turns moving from table to table.
Reflection.
The teacher draws attention to the screen where Lego men say words of gratitude to the children for their help.
How to make a paper duck using origami technique
In this master class we will show you step by step how to make a duckling from single-sided yellow paper using the origami technique. Photo 1.
To make the duckling we prepared:
[*]a square of yellow single-sided paper with a side of 10 cm; [*]a rectangle of the same paper measuring 10x5 cm; [*]glue; [*]plastic eyes.
We will use a square to make the body of the duckling, and a rectangle will be needed to create its head. Let's start with the torso. To do this, fold the yellow square in half with the white side inward.
At the place of the fold we mark the middle, and then bend the sides at an angle (they must be symmetrical).
Then we bend these corners down again.
We make the same fold on the other side.
We will now bend the lower corners to the sides. At this stage, you can use glue to fix all the layers.
On the reverse side we see the resulting blank for the duckling's body.
To create the head, take a rectangle and fold it in half, with the white side on the inside.
Fold the bottom edge of the top layer up.
Then we make folds on the sides in the form of small triangles. Secure them with glue.
Then you need to bend these corners again as follows. Let's use glue again.
Fold the top corners to the reverse side. This is the template for the duckling's head.
We connect it to the body.
Add plastic eyes. Our paper duck is ready.
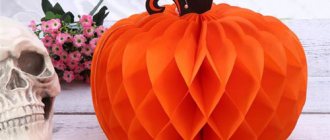
Origami bunny - diagram for kids
By folding a few square pieces of paper we can make the bunny shown in this master class.
To make the craft we will prepare:
- 2 squares of orange single-sided paper;
- glue stick;
- scissors;
- decorative eyes;
- black felt-tip pen.
From one square we will make a head with ears, and the second orange square will be needed to create the bunny’s body. Let's start by folding the square diagonally.
Then we cut it along the fold line. We get 2 triangles. From one we will make a head, and the second triangle will be needed to create the bunny ears.
Let's start with the head. To do this, bend the top of one triangle so that the white side is on top.
Then we will bend another small corner on the muzzle.
Let's form the sides; to do this, bend the edges of the workpiece at a slight angle.
Additionally, we will make folds at the bottom.
We take the second triangle and start making ears from it. To do this, bend the top as follows.
Then you need to bend the right corner up.
Fold the left corner symmetrically. The completed folds can be glued. These are the ears for a bunny.
Glue them on the back side of the muzzle.
Let's start creating the body. To do this, bend the remaining square diagonally.
We bend the side corners of the resulting triangle upward.
Then fold back the small corners. These will be the paws of the future bunny.
To finally form them, you will need to carefully unfold the entire square, and then turn the small corners to the other side. Our bunny got these white paws.
We connect the head and torso together.
All that remains is to design the face. We do this with a black felt-tip pen and also glue on the eyes. We made such a paper bunny.