On the topic: methodological developments, presentations and notes
The purpose of this lesson: Fostering children's love for decorative and applied arts, Forming the ability to correlate images by shape. Development of attention, logical thinking, observation skills.
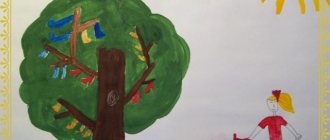
Learn to draw a Christmas tree with branches elongated at the bottom.
Drawing material.
summary on the topic of mother's holiday.
Notes on drawing in the middle group on the topic: “Winter Forest” (non-traditional drawing techniques). Goal: To summarize children’s ideas about winter phenomena in nature, to teach them to convey them in rice.
Source
Strawberry bush coloring page
Of course, we all love strawberries. And we will give her the most honorable place in the garden. I suggest planting many, many beds with these berries. Those who are in favor, let them raise their hands!
But let’s get back to drawing, the “Strawberry” coloring book awaits us.
Let's remember what a strawberry looks like: it is not quite round, but rather like a heart. Please note that its small seeds are on the surface and not inside, like, for example, gooseberries.
So let's color it as shown in the picture. But, before taking up a pencil, let's figure out where to start - first draw the seeds or first color the berries. (Oddly enough, many children want to start with the details. I wouldn’t bother them - let them try and learn from mistakes. But they step on the same rake over and over again: perhaps they need to make hundreds of mistakes in order to learn something, so I usually give it time to think and say my answer.)
As an experienced artist, I will give you some friendly advice: it’s still better to paint. Remember how we shade “round”. Well, after painting, we’ll draw small seeds on the surface of the berry (and scattered, not in even rows
).
Then you can cut out the colored strawberries - they will be useful for the “Berries” applique.
Now let's color the “Strawberry Bush”
To make it more beneficial for the development of fine motor skills, the coloring will also include additional drawing.
Please note that strawberry leaves are not simple, but trifoliate, that is, three leaves are collected on one petiole. When ripe, the berries become heavy and bend the thin petioles with their weight. First let's draw the leaves. Then on each empty branch we will draw large and beautiful berries. Make sure that the berries are really large and of the correct shape. Ready? Now let's color it. We got a good bush, but here’s the problem: somehow there aren’t enough berries.
Let's add some twigs and berries on them, may you and I have a rich harvest!
Beauty, it's time to collect. Someone will start preparing jam for the winter - this is a good thing, but someone will eat everything from the garden, like me, for example.
With you we completed the drawing of the “strawberry bush” pattern and picked the berries Handykids.ru
ECD for drawing with cotton swabs with children of the middle group “Berry by berry”
Olesya Akinina
ECD for drawing with cotton swabs with children of the middle group “Berry by berry”
Direct educational activities
with children in the middle group in visual arts using modern technologies.
«Drawing with cotton swabs»
.
«Berry by berry«.
Goal: Learn to depict objects using non-traditional drawing . Develop children's sense of composition and color.
Objectives: Show a variety of non-traditional drawing . Identify the positive impact on the child’s psychological state. Develop creativity, curiosity, observation. To form an ecological culture (understanding of the intrinsic value of nature)
.
Types of integration of educational areas:
Cognition: Clarify children's knowledge about types of berries . Summarize children's understanding of the diversity of flowering plants.
Social and communicative development: Create the need to share your impressions. The ability to correctly combine words in phrases and meaning. Form a friendly relationship between children .
Artistic creativity: Development of children's creativity in artistic activities using a new non-traditional technique.
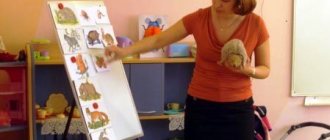
Preliminary work: viewing the presentation
«Berries on the bushes»
.
Demonstration material: pictures of berries , blank for drawing .
Equipment: Sheets of white or light blue paper, cotton swabs , gouache (2 contrasting colors, colored pencils or markers, paper napkins.
How to draw blueberries with a pencil step by step
Today we will learn how to draw a blueberry branch. These are dark purple berries that grow on a bush with large green leaves. The drawing will not be complicated, because the berries have a simple round shape. This lesson on how to draw blueberries with a pencil step by step can be used to teach a novice artist.
Tools and materials: 1. Kraft paper. 2. A simple pencil. 3. Eraser. 4. Colored pencils (blue, cyan, violet, white, light green, green, black).
Drawing blueberries step by step:
Stage one. Let's start by drawing a twig using a simple pencil. First we will draw one wavy line, and from it we will add additional short lines.
Stage two. Let's draw six berries in the shape of a circle. We arrange them evenly along the branch.
Stage three. Next, add small tails to each berry.
Stage four. All that remains is to draw the leaves on the edges of the branch. They may vary slightly in size and curves.
[nextpage]
Stage five. Using a blue pencil, draw the main shade of the berries, leaving room for highlights.
Stage six. Now let's add blue and purple colors to the drawing.
Stage seven. Using a white pencil, apply highlights according to the shape of the berries.
Stage eight. Draw the leaves with a light green pencil. This will be the main color.
[nextpage]
Stage nine. Add green shadows around the bends in the leaves. This trick will give them volume.
Stage ten. All that remains is to use a white and black pencil to enhance the contrast of the drawing. Ready! Now we have learned together how to draw blueberries.
narisovat.com
Progress of the lesson:
View a presentation about berries .
Tasks: The ability to form coherent speech, listen to other children. Anwser the questions. Increase knowledge of the names of berries .
Educator: Guys, listen to the poem “Currant”
Currant berries
There is an old recipe
Educator: Guys, today I brought such a wonderful chest.
A riddle will tell us what lies in it:
I'm friends with a pencil
Where he passes, he places a drawing. (Paper)
.
Educator: That's right guys, this is paper. How did you guess? What words did you suggest? (children answer)
.
magically draw on it “ Berries on the bushes .”
Educator: Guys, I have another wonderful chest.
And what lies in it will tell us the verse - a riddle:
Like on a stitch, on a path
I found this earring.
I bent down for one,
And I came across ten! (Strawberry)
Educator: That's right guys, it's Strawberry!
Educator: Guys, let's draw a wonderful strawberry bush with you! The teacher shows the children how to create a rhythmic composition - on a flannelgraph or magnetic board by laying out a row of berries (circles)
red, green, etc
Next stage: Drawing .
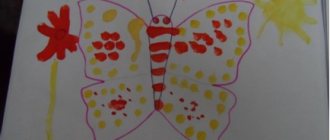
Children draw berries using cotton swabs .
take a sheet of paper A-4 white or blue
use a felt-tip pen or pencil to draw a twig
take a cotton swab , dip it in red paint and draw berries
Educator: Guys, let's read a poem about strawberries!
I was walking in the forest, carrying strawberries,
I looked for it, collected it.
I'll bring it to kindergarten -
You guys are great, you make wonderful berries . Now let's play with our fingers a little.
Finger game (Raspberry)
(T. Koti)
Raz-raspberry, two - raspberry, (clap your hands at the right ear, then at the left)
Marinka ate (touch the fingers of the right hand, gathered in a pinch, to the left palm - “eat”
)
And in Marinka’s basket (Place slightly rounded palms towards each other - “basket”
)
Not a raspberry left. (look in the "basket"
then spread your arms to the sides)
Who will go for berries ? (stomp)
He'll take the basket! (clap)
Educator: Guys, was it interesting in our group ?
What new did you learn about berries ?
What did we achieve in the lesson?
How did we draw berries on the bushes ?
What did you like?
Educator: Thank you guys!
Summary of visual activities in the middle group. Topic: dishes drawing cups and saucers. Objectives: To form a correct idea of tableware, its purpose, to learn to differentiate objects within the same kind (teaware,...
Summary of a lesson on drawing with cotton swabs “Berry by berry” (second junior group) I present to your attention a summary of an unconventional lesson on drawing (by cotton swabs) in the junior group of the kindergarten “Berry by.
GCD in the senior group for drawing with cotton swabs and familiarization with the surrounding world “Rowanushka” Summary of educational activities on artistic and aesthetic development in the senior group. Developed and conducted by G. V. Grigorieva.
Non-traditional drawing technique - Pointivism (with cotton swabs) In order to teach a child to draw, along with software teaching methods for each specific age, it is very useful to use. GCD for drawing with cotton swabs “Snowball flutters and spins” Topic “Snowball flutters and spins” GOAL: To introduce children to new techniques of non-traditional drawing techniques (with cotton swabs, to introduce.
Summary of educational activities for drawing with cotton swabs “Seeds for birds” Purpose: To teach children to draw with cotton swabs, create a rhythmic composition (grains). Develop a sense of rhythm. Cultivate interest.
How to draw berries with a pencil step by step
At the request of Inna Izmailova, I made a lesson on how to draw berries. Well, of course, not all at once. In the picture I only show strawberries and black and red currants. Here is a photo:
Berries are one of the many joys of my childhood, and, I think, yours too. To spite botanists, we usually call berries everything small and tasty that you can stuff into your mouth and swallow with pleasure. Even if they are green, sour or wormy, this does not prevent you from enjoying the taste. And, according to Bear Grylls, the latter are doubly useful, because the worm contains a lot of protein, amino acids and vitamins, which not only satisfy hunger, but also strengthen the body. I also want to sympathize with the guys living in big cities, who don’t have a dacha, a village, or anything like that, where a lot of goodies grow. After all, only at the dacha can you fill your pockets full of this deliciousness without having money, and you won’t get anything for it.
How to draw berries with a pencil step by step
Step one. First of all, let's sketch out the outlines of the main elements of the drawing.
Step two. Let's start drawing, add the shape of the leaves and the berries themselves.
Step three. Let's outline the contours more clearly.
Step four. Let's add hatching and remove unnecessary lines.
Step five. Let's make it beautiful.
I hope you did much better than me. Try coloring as well. And in conclusion, I give you another list of lessons on drawing other still lifes:
- Raspberries;
- Cherries;
- Large watermelon;
- Strawberries;
- Orange;
- Apples;
- Bananas;
- A pineapple;
TrustNo1
Especially for DayFun.ru
dayfun.ru
Leave your comment
Responsibility for resolving any controversial issues regarding the materials themselves and their contents is taken by the users who posted the material on the site. However, the site administration is ready to provide all possible support in resolving any issues related to the work and content of the site. If you notice that materials are being used illegally on this site, please notify the site administration using the feedback form.
All materials posted on the site were created by the authors of the site or posted by users of the site and are presented on the site for informational purposes only. Copyrights for materials belong to their legal authors. Partial or complete copying of site materials without written permission from the site administration is prohibited! The opinion of the administration may not coincide with the point of view of the authors.
Source
Let's draw berries
I have an idea to start mastering various folk painting styles - Khokhloma, Gorodets - there are many of them, so the plans are Napoleonic. But this is during the school year, and while it’s summer, we need to quickly, quickly draw as many branches, flowers, and trees from life as possible. Because without knowledge of nature - nowhere! Copying classic patterns is a good thing, but you also need to come up with your own, and for this you need a fair amount of your own impressions and life drawing skills.
One of the most common motifs in folk painting is a pattern with berries. Great! Which berries have already been studied “in nature”? We already know how to draw strawberries, raspberries, currants... They will come in handy! But this is somehow not enough for me. Well, we have something else to admire in the garden. Excellent beautiful bush with red berries.
But here I will introduce some intrigue: I won’t say what this plant is called! Guess and please write in the comments.
I will formulate today’s topic in general: how to draw berries.
Well, berries are berries, and greenery must also be depicted: greenery perfectly decorates and harmonizes the composition, we talked about this back when we discussed drawing bouquets.
In general, I will draw the entire branch. First, with a pencil, I outline the outline of the branch, leaves and determine the outline of the bunch of berries.
Now I will depict the leaves located opposite the leaves - they are very large, odd-pinnate. The leaves are elongated-lanceolate with a serrated edge. Here I would like to note the fact that it is generally human nature to cling to small details and exaggerate them. Therefore, I ask you right away: when you draw leaves with a jagged or serrated edge, you should not focus your attention and work on these teeth too much. Let's just hint that they exist.
We've sorted out the leaves, and now it's time to get to the berries.
How to draw berries step by step
By the way, should we start drawing with berries or twigs?
I’m used to starting from a structure diagram and, of course, I’ll start with the load-bearing elements - twigs. I carefully study the brush - it branches very strongly, and reminds me of the Mandala that we painted.
The berries grow at the ends of the branches in twos or threes. Quite a patterned pattern.
And now let’s “thicken” the bunch a little more.
Let's color it: the berries are matte red, but note that they have highlights and shadows. Moreover, of course, they are not distributed scatteredly. My light comes from the left, which means all the shadows are on the right. Since the bunch is voluminous, some of the berries fall into the shadow entirely - well, here you need to look carefully at nature, and not just mechanically paint on the dark holes from the right barrels of the berries.
While I was painting, the leaves withered and shriveled, alas. And I completed the drawing with watercolors almost from memory.
This is how the drawing turned out - a branch with berries and leaves. And, okay, I’ll tell you a secret - these are elderberries.
Marina Novikova told you how to draw elderberries.